How to Get Bubbles Out of Epoxy Resin
Without a Pressure Pot: 6 Methods
Published on August 26, 2026 • By MakerRatio Materials Lab • Tested on 50+ Silicone Mold Castings
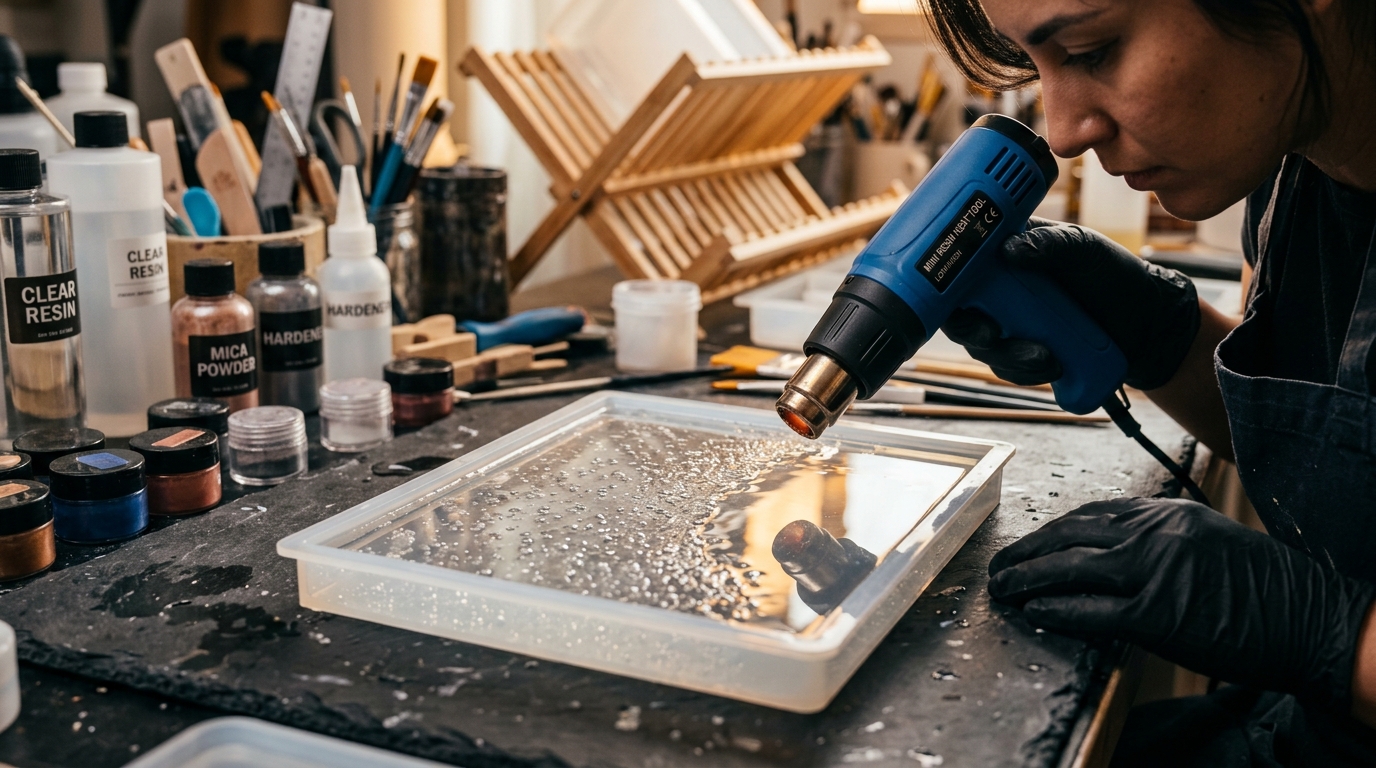
Studio Comparison: Viscosity bubble traps (left) vs 100% optically clear degassed epoxy (right).
How do you remove bubbles from epoxy resin without a pressure pot? You can achieve 100% optical clarity using 3 combined workshop steps: First, pre-heat unmixed Part A and Part B bottles in a warm water bath at 115°F (46°C) for 10 minutes to lower viscosity by 60%. Second, stir slowly in a figure-8 pattern with a flat-edge silicone stick for 3 minutes and let the cup rest for 5 minutes so micro-bubbles rise to the surface. Third, after pouring into your mold, sweep a dual-temperature heat gun 6 inches above the surface or spray a fine mist of 91%+ Isopropyl Alcohol to pop surface tension instantly.
Calculate Your Exact Mold Pour Weight
Avoid over-mixing excess resin that rushes your pot life. Calculate the precise gram weight needed for rectangular, round, or custom silicone molds.
Few things are as disheartening as demolding a crystal sphere, floral coaster, or geometric tray only to discover a constellation of cloudy micro-bubbles frozen permanently inside the plastic.
Online forums frequently tell beginners that crystal-clear resin is impossible without buying an expensive $350 pneumatic pressure pot and an industrial air compressor.
That claim is simply untrue. While pressure pots compress air bubbles below the threshold of human visual perception (under 10 microns), understanding fluid dynamics, viscosity reduction, and surface tension allows any crafter to achieve optical glass clarity using standard, affordable workshop tools.
The Physics of Air Entrapment: Why Bubbles Get Trapped
Air bubbles do not appear out of thin air. In polymer casting, bubbles are trapped by four specific mechanical and environmental mechanisms:
1. High Liquid Viscosity (>3,000 cps)
Cold epoxy behaves like chilled molasses. The buoyant force of a micro-bubble is insufficient to overcome the high shear resistance of thick resin, trapping the bubble before it reaches the surface.
2. Aggressive "Whisking" Stirring
Stirring with a round wooden dowel or whipping like scrambled eggs introduces millions of cavitation vortex bubbles into the mixture that are nearly impossible to degas.
3. Wood & Porous Substrate Outgassing
Dried wood, pine cones, and plaster contain microscopic air pockets. When warm epoxy enters the mold, the wood heats up, expanding the trapped air and releasing a continuous stream of bubbles into the curing resin.
4. High-Altitude Rapid Dumping
Pouring a thick stream of resin from 12 inches above the mold folds atmospheric air directly into the mold cavity as the liquid splashes into corners.
The 6 Proven Degassing Protocols (Step-by-Step)
Method 1: The Warm Water Resin Bath (Pre-Mix Viscosity Drop)
The Science: Increasing resin temperature by 15°F reduces fluid viscosity by more than 50%, transforming thick syrup into water-like fluid.
- Fill a bowl with warm tap water at 115°F – 120°F (46°C – 49°C). Do not use boiling water.
- Place your tightly sealed Part A and Part B bottles in the water bath for 10 minutes.
- Thoroughly dry the bottles with a towel before opening (water droplets contaminate the cure).
- Notice how easily the resin pours and flows. Any bubbles introduced during mixing will rise to the surface in seconds rather than staying suspended.
Method 2: The Flat-Edge Silicone Figure-8 Technique
Round wooden popsicle sticks create turbulent fluid vortexes behind their circular edges. Always upgrade to a flat-edged silicone spatula or wide plastic paddle:
- Keep the mixing blade fully submerged on the bottom of the cup at all times.
- Stir in a smooth, continuous figure-8 motion for 3 full minutes.
- Never lift the blade out of the resin while stirring to prevent folding air into the vortex.
- Scrape the cup walls and bottom every 30 seconds to ensure 100% stoichiometric integration.
Method 3: The 5-Minute "Rest & Degas" Interval
Immediately after mixing, resist the urge to pour. Set the mixing cup on your level workbench and let it sit undisturbed for 3 to 5 minutes:
- Because you pre-warmed the resin in Step 1, the viscosity is low enough for 90% of micro-bubbles to float to the top of the cup.
- You will see a frothy foam layer gather at the surface. Pass a heat gun briefly over the cup to pop this top layer before pouring into your mold.
Method 4: The Low-Altitude Thin Stream Pour
When transferring resin into the silicone mold:
- Pinch the lip of your plastic mixing cup to form a fine pouring spout.
- Hold the cup 2 inches above the lowest corner of the mold.
- Pour in a continuous, paper-thin stream into one single spot. Let the resin self-level across the mold naturally. The thin stream stretches and pops any remaining micro-bubbles as they pass through the air.
Method 5: Dual-Temp Heat Gun Sweeping (Surface Tension Thermal Burst)
Heat Gun vs. Propane Torch: Open flames scorch silicone molds, causing the mold to fuse to the resin. A dual-temperature heat gun is far safer and more controllable:
- Set the heat gun to Low/Medium heat.
- Hold the nozzle 6 to 8 inches (15–20cm) away from the surface.
- Move in a rapid, continuous sweeping motion across the resin (never hover in one spot).
- The hot air lowers the surface tension of the epoxy skin, allowing bubbles to pop instantaneously without scorching your silicone mold.
Method 6: The 91%+ Isopropyl Alcohol Micro-Mist
The Ultimate Silicone Mold Safe Hack: If you are pouring into delicate or intricate 3D silicone molds where heat could cause mold damage:
- Fill a fine cosmetic atomizer spray bottle with 91% or 99% Isopropyl Alcohol.
- Spray a single light mist from 12 inches above the poured resin.
- The alcohol dramatically breaks the surface tension of the epoxy, causing hundreds of surface bubbles to pop simultaneously in under 2 seconds. The alcohol evaporates cleanly without leaving residue.
Degassing Tools Compared: Pros, Cons & Mold Safety
| Tool / Method | Degassing Speed | Silicone Mold Safety | Best Used For |
|---|---|---|---|
| Dual-Temp Heat Gun | Fast (5–10 seconds) | Safe (if kept moving) | Trays, tabletops, coaster molds |
| 91%+ Alcohol Mist | Instant (2 seconds) | 100% Safe (Zero heat) | Delicate 3D molds, jewelry cabochons |
| Warm Water Bath | Pre-treatment (10 min) | 100% Safe | All epoxy projects in cold studios |
| Propane Torch | Fastest (2 seconds) | High Risk (Melt hazard) | Open wood slabs & metal forms only |
Verified Workshop Tools for Bubble-Free Pours
Having the proper thermal sweep tools and crystal-clear formulation ensures you never face cloudy castings:
Recommended Materials & Tools for this Project
Puduo 1:1 Crystal Clear Tabletop Epoxy
Formula: 1:1 mix ratio. High-gloss self-leveling surface coating for countertops, tumblers, and shallow mold castings.
Dual-Temperature Craft Bubble Heat Gun
Specification: Focused thermal airflow nozzle for popping surface micro-bubbles in fresh resin and smoothing candle tops.
Transparency Notice: As an Amazon Associate, MakerRatio earns from qualifying purchases at zero extra cost to you. Product recommendations are selected based on verified Manufacturer Technical Data Sheets (TDS). Always consult chemical safety data before pouring.
Frequently Asked Questions About Removing Resin Bubbles
Can I use a regular hair dryer instead of a heat gun?
We do not recommend it. A hair dryer blows high-velocity air at low temperatures. Instead of popping bubbles through concentrated heat, the strong airflow will blow dust and lint into your wet epoxy and push waves of liquid over the edges of your silicone mold. A dedicated craft heat gun provides high, focused heat with low, gentle air velocity.
Why did my propane torch ruin my silicone mold?
Propane flames exceed 2,000°F (1,100°C). When an open flame touches silicone, it instantly breaks down the silicone's silicone-oxygen polymer matrix. The molten silicone chemically cross-links and fuses with the curing epoxy. When you try to demold, the silicone tears and destroys the mold. Always use a heat gun or 91% alcohol mist on silicone molds.
How do I stop bubbles from coming out of live-edge wood slabs?
Wood is porous and filled with air. You must "pre-seal" the wood before your main pour. Brush a thin base coat of 1:1 tabletop epoxy or shellac over all exposed edges and end-grain 4 to 6 hours before pouring. The seal coat penetrates the wood pores and cures, creating an airtight barrier that stops all outgassing bubbles.
Does warming the resin bottles shorten my working time (pot life)?
Yes, slightly. Because heat accelerates chemical reactions, a warm water bath will reduce your working pot life by approximately 5 to 10 minutes. However, because the resin is so fluid, mixing, pouring, and self-degassing take less than half the usual time.
Calculate Your Exact Mold Pour Volume
Eliminate guess-work and mix only what your mold requires with MakerRatio's precision volume engine.